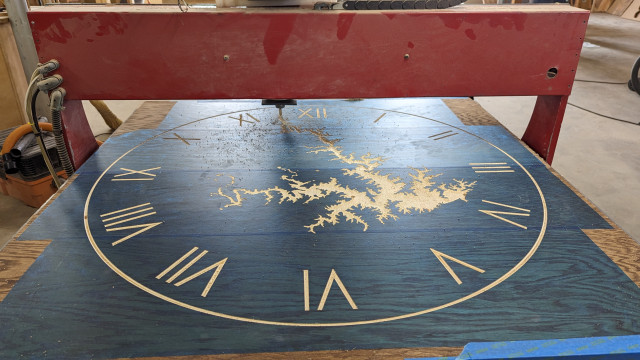
I decided to build a miniature 2′ x 2′ version of the clock before beginning the final 4′ x 4′ version. This let me test out the different methods and processes used before a lot of material was on the line. In the end, I didn’t change much between building the two versions, but I’m happy that I ended up with two clocks!
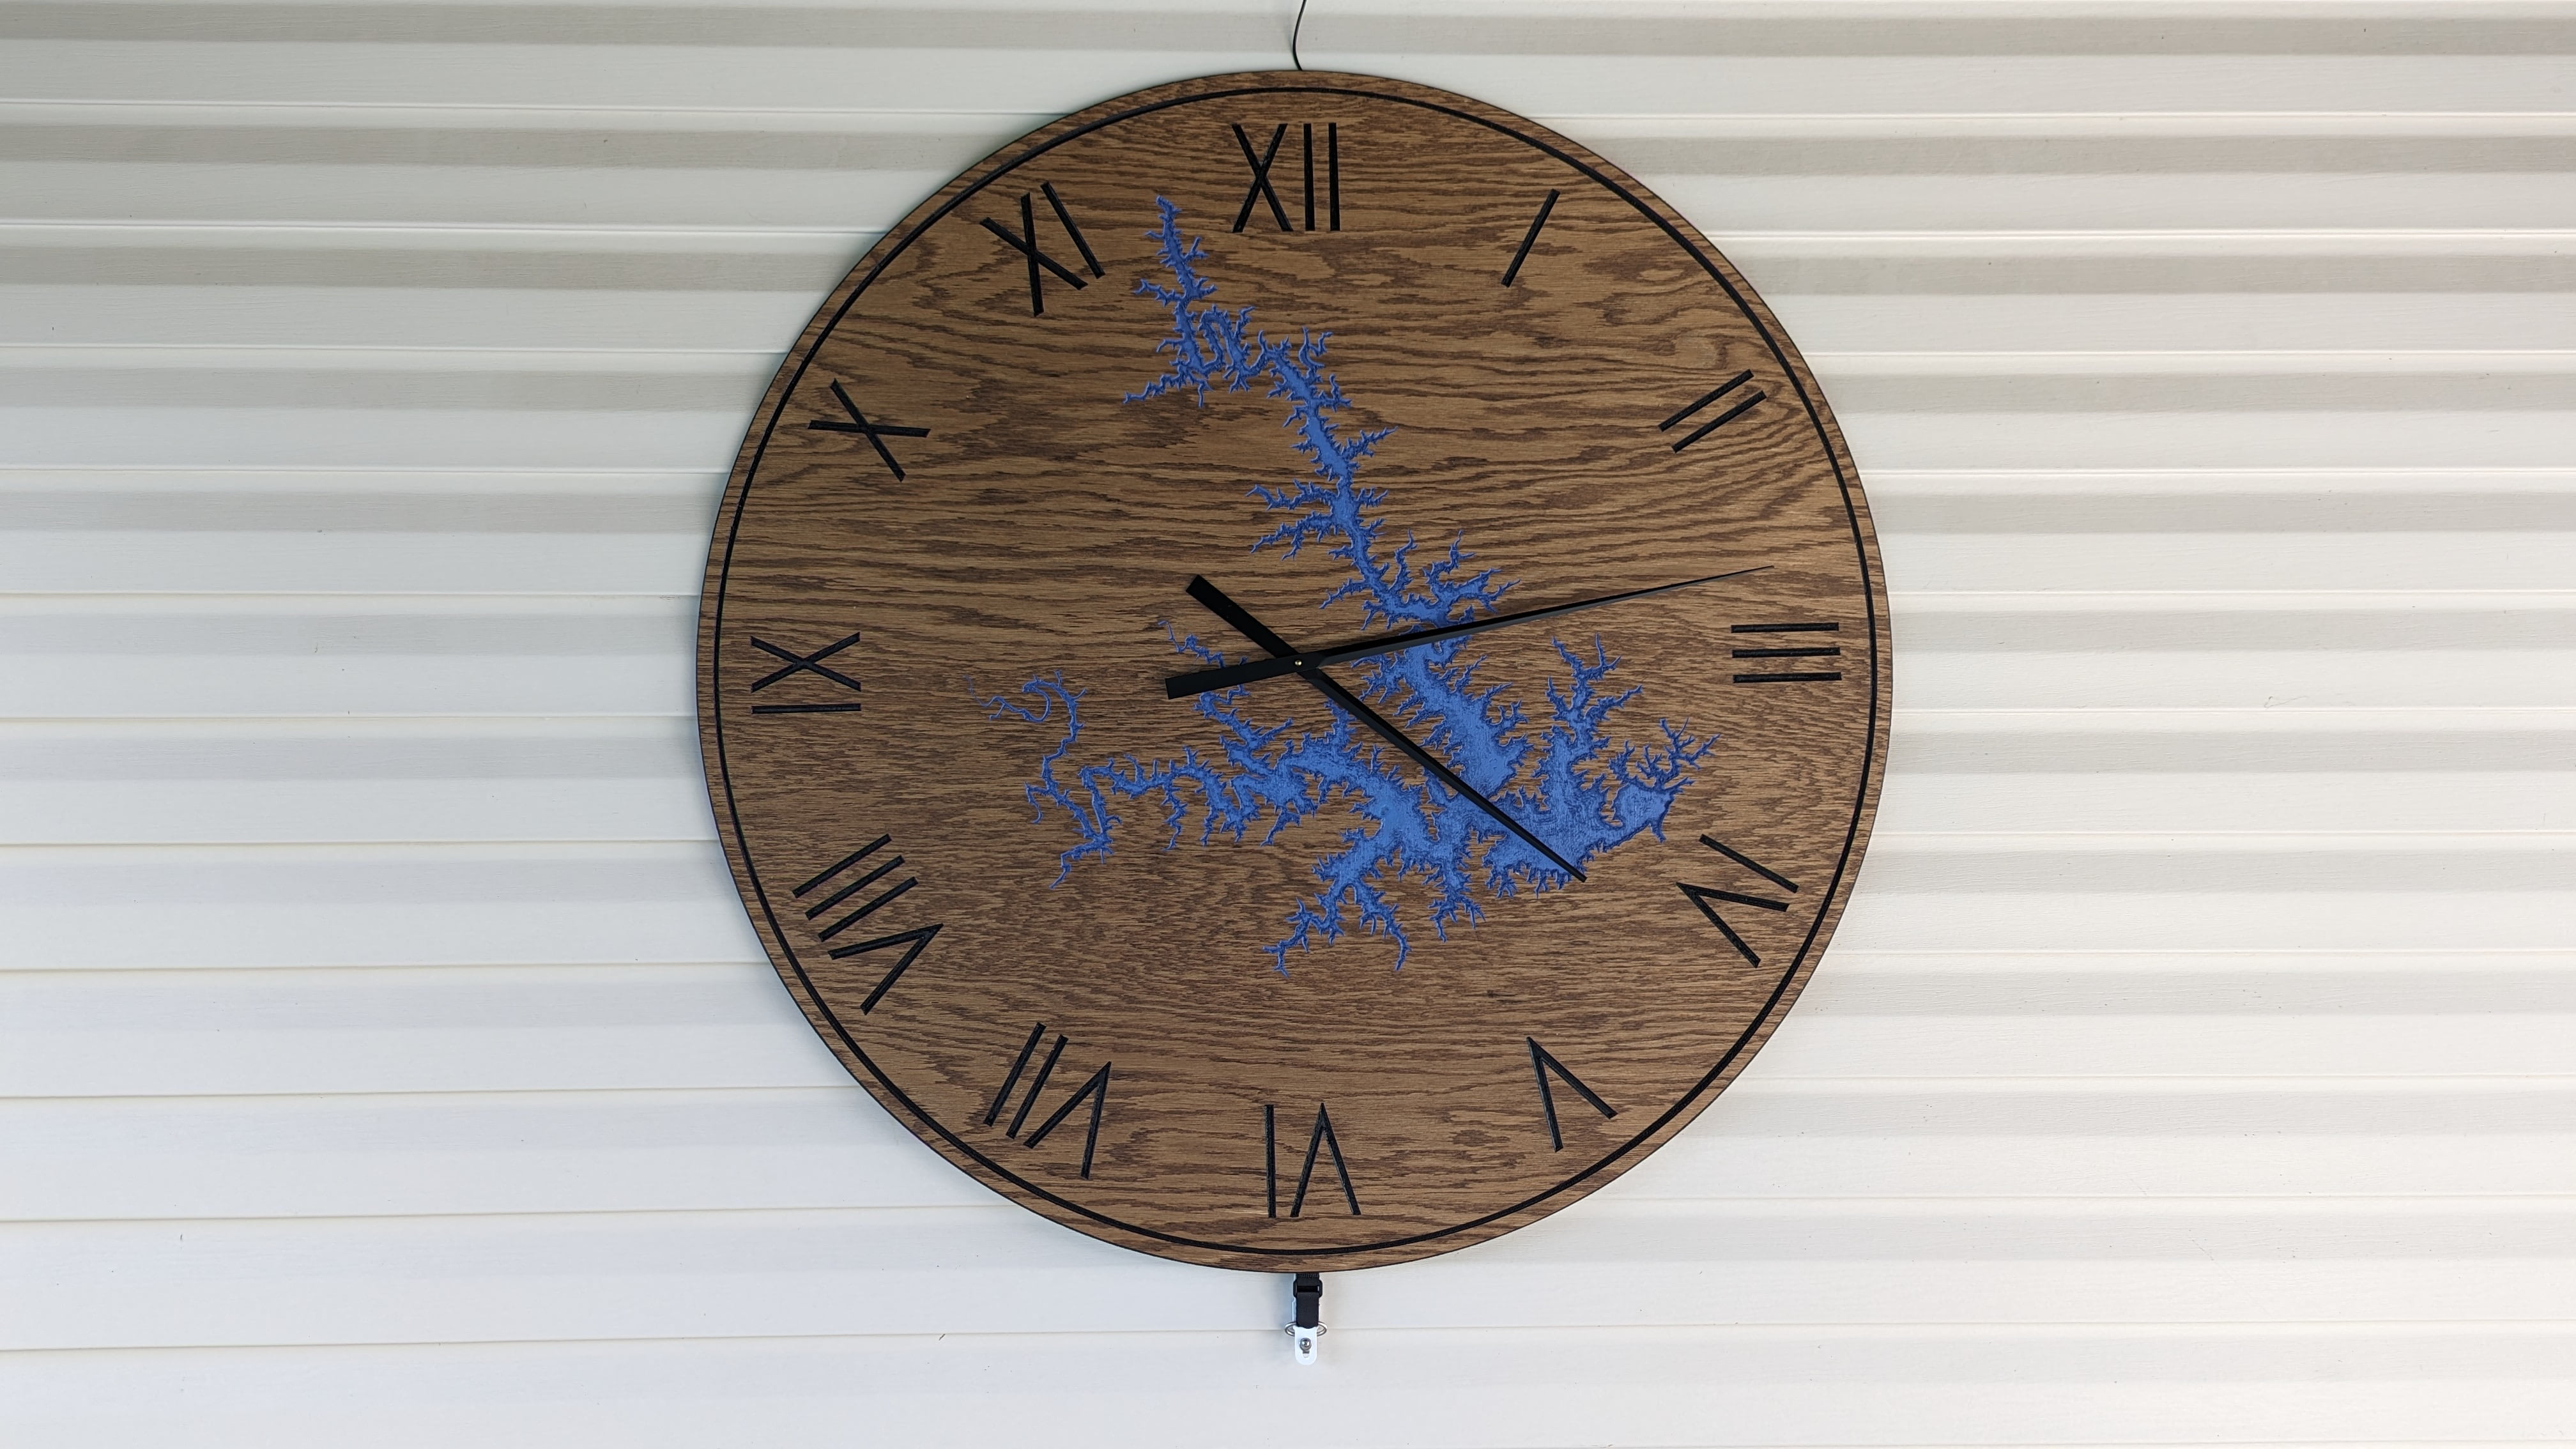
Build Process Overview
The common element of this build is selectively masking and revealing different zones of the clock face (carved into the material from the CNC router) to give each zone its own contrasting look. The water is a recessed area covered in blue paint, then numbers around the outside are simple v-slot carves covered in black paint, and the background of the clock face is a stained wood veneer.
My general plan for the build was to:
- Cut the background material (plywood) down to size
- Stain the entirety of the material to the desired background color
- Mask the entirety of the material with an adhesive masking film
- CNC cut away pockets of material for both the lake and the numbers
- CNC cut away the movement mounting hole in the middle, and finally the border of the clock
- Paint the lake blue
- Mask the lake, then paint the numbers around the outside black
- Remove all of the masking and cover the part with a clear protective coating
Small Clock Build
I chose 2′ x 2′ as the nominal size for the small test clock because it gives me 4 attempts worth of material, can fit on my CNC, and would still make an excellent indoor clock.
Material Preparation
I stained a 2′ x 2′ section of my plywood using the only wood stain I happened to have laying around (oil based). I let it dry for a few days to make sure it had properly set. Despite a fairly half-hearted approach to the stain the end result was surprisingly even!

Next I covered the stained area using two strips of Oramask 813 (12″ wide roll, but there was some overlap). On the first strip (right) I tried to apply by hand, but there were tons of wrinkles and bubbles that I couldn’t get out. On the second strip (left)I used a wiper from an old screen protector application kit and it did a much better job!

Finally I cut the square out with a table saw. In hindsight it would have been way easier to cut the wood first, but I was originally thinking I might just mount the whole 4′ x 4′ board to the CNC table.
CNC Routing
CAM
I originally set this project up in F-Engrave, a free V-carve software. However, I wasn’t happy with my ability to preview and validate toolpaths in the built-in visualizer, which was especially concerning because of the issues I was having getting it to properly import units from the DXF file. The perimeter G-code it came up with didn’t quite make a perfect circle, and I wasn’t able to select different features (lake vs numbers vs bevel) to set up different machining strategies.

I looked into some external visualizer options, but then I came across CarveCo and decided to try their ‘Maker’ subscription, which is easy to do on a month-to-month basis for only those months when I need V-Carve CAM. It imported my DXF easily and to scale. I appreciated that when I made toolpaths for different features the software already had tooling options pre-loaded with starter feeds and speeds.
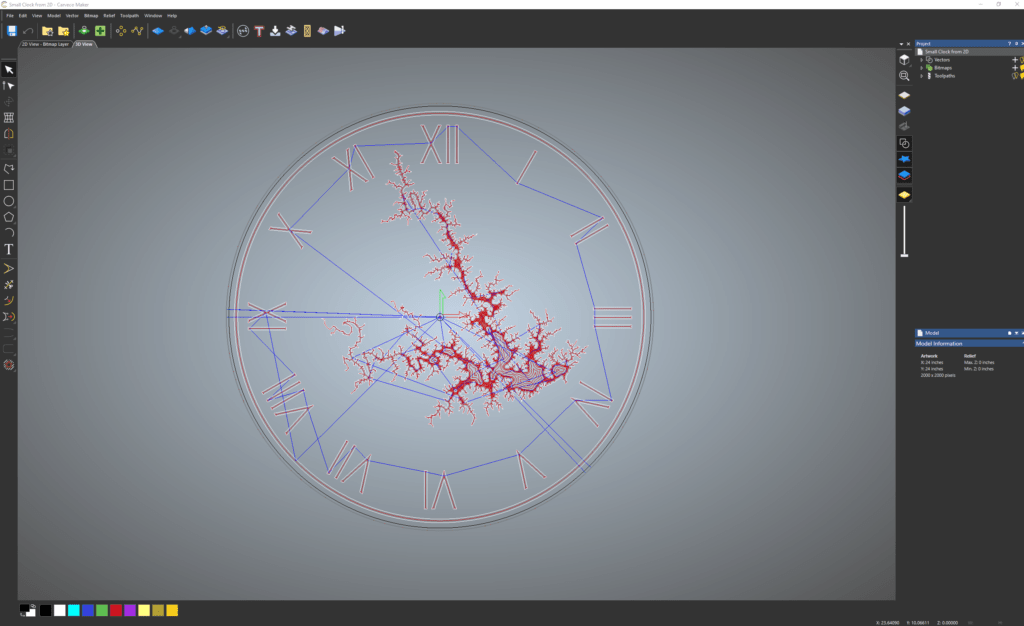
The V-carve infill pattern in CarveCo (‘concentric’ perimeters) was preferable to the F-Engrave version (rectilinear) for this project because people think of lakes as naturally having those parallel contours. Finally, I felt a lot better exporting my G-Code because there was a built-in 3D simulator that shows where exactly material will be removed.

Work Holding
While I have seen tons of different approaches to holding work pieces during carving, one big constraint I had to work around was needing to cut out the perimeter when I was done without having a spoilboard to cut in to. While I have seen people use carpet tape to get good adhesion to the table, the only technique I’ve ever used before is the blue tape / foam tape sandwich.

In this method, large areas of painters tape are used to create a residue-free removable surface on the table and work piece. The double-sided foam tape connects the two pieces of blue tape together and elevates the work piece off of the table, allowing the endmill to undercut the work piece during the final parting cut.

The downsides to this method are that you need a lot of foam tape to provide decent rigidity to the work piece (which is especially important when V-carving!), and that the height of the top surface is less parallel to the work table because of variability in the tape thickness.
Machining
The origin of this part is the center of the clock, so I lined up the gantry to the middle of the work piece and tore my work coordinates in X and Y. For each tool I loaded, I manually moved the Z axis down until I could no longer slide a piece of paper between the tool and the work piece, then set the Z axis zero position at that height.
The first program is a set of roughing cuts with a 1/4″ endmill that efficiently remove a lot of work from the V-bit. It also cuts out the clearance hole in the center of the part for the clock hands to mount to.
The second program is about an hour of V-carve. First the outline accent and bevel is carved, then all of the numbers are carved, which is relatively straight forward at this scale. Then the lake is carved out in concentric full depth pockets. The final pass is a full, detailed perimeter of the entire lake where all of the partial-depth features are added.
The final program is a simple outline profile cut with a 1/4″ endmill to separate the clock face from the work piece.
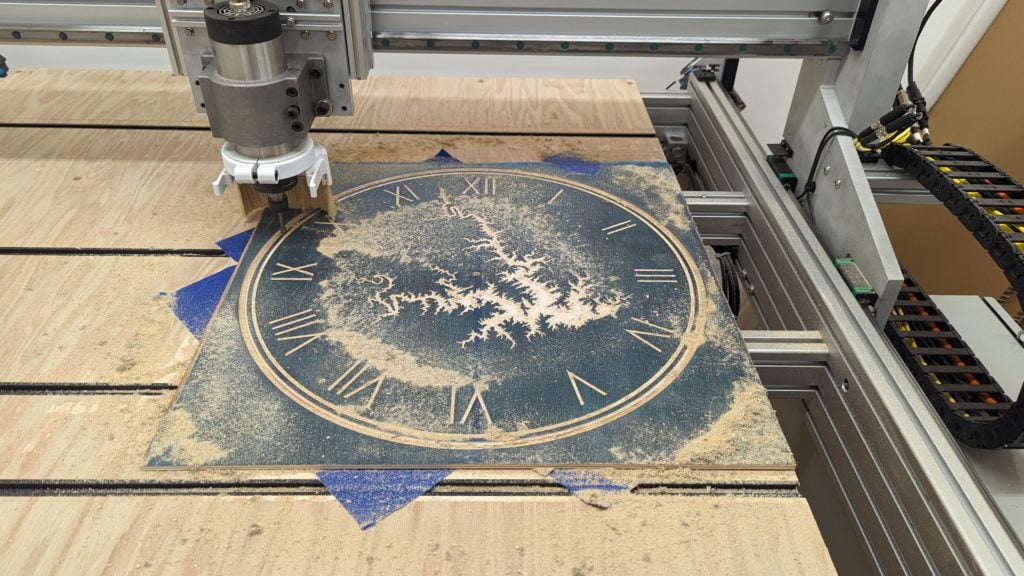
Removing the clock from the CNC is fairly easy. The blue tape peeled off of the CNC table with gentle pressure, then I was able to flip over the clock face and remove the blue tape from the part. Even though I had the endmill set to cut slightly deeper than the theoretical depth of the plywood it didn’t manage to make a complete cut. The little connecting strands broke when I pulled off the clock face, and then I had to sand them smooth.

Finishing
Besides sanding off the rough outside edge of the clock face, the first step I took was to double check that the masking film was still fully adhered to the wood. To my surprise, it was still stuck on pretty good everywhere, despite the bubbles in my initial application!
The worst part about this project was all of the fuzz, fibers, and strands inside the V-cut areas. The texture would seem out of place on the final product and I was worried that it would impact that paint application later.

I tried sandpaper and craft blades, but I don’t have the patience or skill to use either of those tools effectively. I finally landed on using a little round carving tool on my dremel, which was somewhat effective, but by no means perfect, at removing the fuzz.

After I felt that I had a surface that could be reasonably painted I covered up a few close by numbers with post-it notes and sprayed in the lake blue. The wood fibers soaked up the paint super fast and I ended up using four coats to fully color in the lake.

I let the lake dry overnight then covered up all of the lake features with paper and masking tape. It also took four coats of black paint to color in the numbers and outside accents. I decided not to color the back.

After that dried overnight I could peel away first the paper and tape, then the masking film, to reveal the final clock face image. This was a stressful moment because I didn’t know how well the film kept the paint from seeping through, but I was smiling ear-to-ear when I saw the numbers get revealed!

The final step is to coat the outside in a clear acrylic spray to protect the unpainted surfaces. I ended up doing 5 coats, sanding in between every other coat.

Mounting the clock arms is extremely easy. There is just a stack up with a gasket, washer, and hex nut to sandwich the module around the clock face. The hour hand presses in and the minute hand gets retained on a flat-sided shaft with a cap-nut.
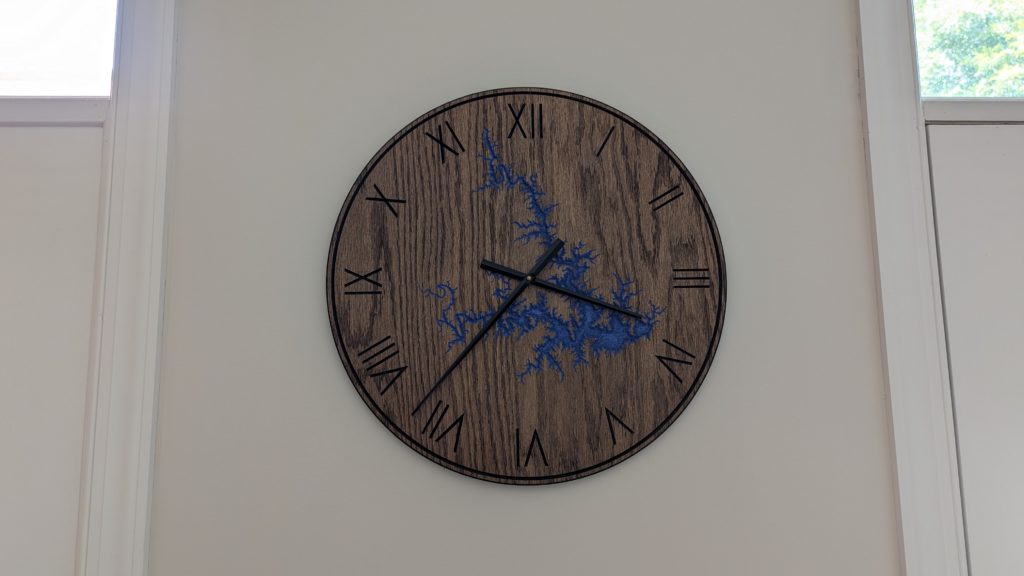
Large Clock Build
The large clock is too big to fit on the roughly 2′ x 4′ capacity of my own CNC, but luckily I have access to a 4′ x 4′ CNC router at my local makerspace. It uses LinuxCNC instead of DDCSE, but besides that is very comparable to my own machine.
Material Preparation
The staining and masking worked just as easily as the small clock. I paid a little more attention to my smoothing method and ended up with significantly fewer wrinkles this time. I was running very low on masking film, but because I skipped covering the corners of the square I had enough to get me through the project!

One issue I had was that after transporting the masked material to the makerspace I found that something had rubbed a hole through the film in one spot. After cleaning up the rough edges and smoothing out the remainder I was able to just place a scrap corner of film (peeled off from somewhere else) over the gap.


CNC Routing
CAM
Besides scaling up the size, I made very few modifications to the CAM program. One change was to cut even further below the theoretical bottom of the plywood when running the final perimeter cut pass. This did not end up helping and I still had tons of splitting and separation on the back. The other change was to cut the lake pocket slightly less deep to hopefully avoid some of the deburr work. This helped in some areas, and if I worked hard to dial in the perfect mid-ply depth it might be a viable strategy.
Work Holding
I realized too late that I didn’t have nearly enough foam tape left to adequately support the material. I tried to disperse the tape as evenly as a could, but I left the corners very unsupported. I thought it might not matter because the corners are mostly scrap, but I immediately noticed issues when the V-bit carved the outside accent feature.

Machining
The biggest difference I noticed while running this program was that the 1/4″ roughing endmill was able to remove a lot more material than on the smaller clock. This kind of efficiency is what kept the carving work from taking four times as long as on the small clock!
Despite the limited work holding the V-carve details still came out very well (at least for the lake features in the middle of the part!). I ended up running the program at 200% to shave an hour off the run time, and at least half of the G-Code lines were the final perimeter pass.
Finishing
This clock was masked, painted, revealed, and coated in a similar way to the small clock.
One issue I had when removing the masking film was that it tended to pull up some of the top of the plywood with it in a few areas. This plywood spent almost two weeks sitting with the masking on before I was able to cut it at the maker space, so I wonder if the heat from the garage or sitting in the sun on the way to the maker space caused the adhesive to penetrate into the wood further than it did in my small test clock.

In the end all of the sanding and layers of acrylic worked to stabilize the top surface and the defect is barely noticeable. I mounted the clock module to the middle, plugged in the battery defeater, and installed the clock at the boathouse:
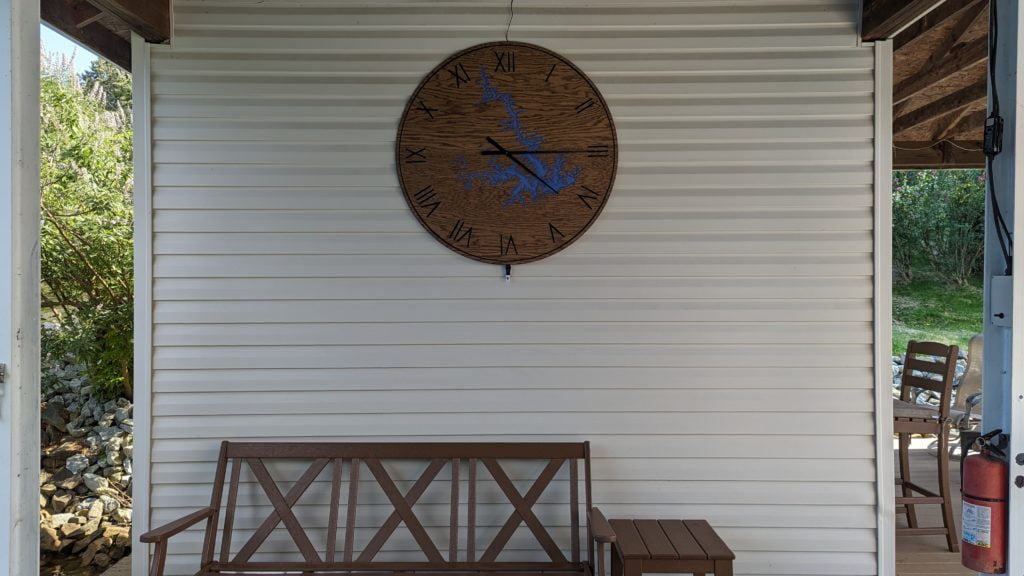
Securing the clock to vinyl siding took more work than I expected. The vinyl siding clips I found were great at hanging loads, but I wanted the bottom clip to pull down on the clock to stabilize it against wind. I ended up modifying the bottom clip to make it work a bit better, then installed some Velcro to help me tension it.

Lessons Learned
The hardest part about this project was deburring the wood fibers. If I could do it all over again (or turned it into a product) I think I would make the base material plastic instead of wood. With the base material plastic, I would probably buy a fake plastic wood-styled veneer for the top layer as well, which would improve durability and let me pick a lighter final color more easily (to improve contrast).
Using a two-color multilayer plastic as the base with a wood veneer glued on top might let me use carve depth as a way to select which of the three colors shows on the top in the final piece. This would virtually eliminate the tedious post processing (deburr, paint, reveal, clearcoat) and potentially improve the durability of the final product too.
Finally, the biggest lesson is that you always need a bigger machine than you think! I did design a 4’x4′ configuration for the CNC router, but never thought I would need it. It is ironic that one of my first projects on the machine needed more space!


